This page is a work in progress.
Weather data is gathered from a Davis Instruments Vantage Vue Pro 2, with Solar and UV sensors and an aspirated radiation shield for the temperature and humidity sensors. I am currently processing webcam output into multiple formats which are displayed and/or linked starting here. Those of a more technical persuasion might be interested in the image processing details section.
Weather Underground Detailed measurement history, webcam, etc.(Click below for details or here if your browser does not support flash):
Davis WeatherLink:
CWOP(Citizen Weather Observer Program): Historical/current graphs, selectable time range
Historical/current graphs, 15 days of historical data
Dash Panel
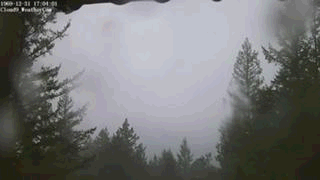
Webcam: Webcam faces approximately South, toward Seaside/Monterey; lights from those communities are occasionally visible across Monterey Bay.
Below is the latest pic from this weather station's webcam:
Below is the latest GIF made with hourly images from this weather station's webcam(click for more detailed GIF, usually 5-8MB by the end of the day):
Below are different quality versions of the video from the previous day. These are updated shortly after midnight
Original Video MPEG from yesterday's Webcam(60-80MB)
Lower Bitrate Video MPEG from yesterday's Webcam(11-13MB)
YouTube Channel: Videos are uploaded to YouTube every night. Usually I will watch them in the morning and if interesting enough to publish, I do so with a title, description, and keywords that are used to populate playlists. See the YouTube channel's "about" page for more details. Link to channel
Here is the latest video uploaded to YouTube:
NOTE: I am doing some metadata cleanup of YouTube videos starting at the beginning of 2016. Videos for every day were already auto-uploaded to YouTube but until I catch up to present day the video shown here will not be current; it will be the most current that is publicly available.
Image Processing Details:
Webcam is a Foscam FI8904W facing approximately South. Currently the camera captures a 1280x720 image every 15 seconds and immediately uploads it to this server. Initially I thought that I would simply upload images to Weather Underground and they would generate daily time-lapse videos. Some users are able to get fairly stable results doing this, but in those cases the videos are very small and very poor quality. My contact with WU tech support indicated that high resolution images were not advisable, and recommended images < 80K in size, and no more than one image upload per five minutes. I wanted better, and so I set out to make it happen. Below is a summary of the image processing chain as it stands today. The work is currently divided up between three perl scripts and a shell script all built from scratch and a slightly modified version of the python YouTube uploader script provided by Google.
- Images are received from the webcam in a staging directory. Note that these files incorporate a timestamp in the filename as-sent from the webcam, this datestamp having a resolution of one second.
- Every four minutes, a Perl script is launched by a cron job on the server. This script performs the following actions:
- Get a list of the files in the staging directory.
- For each file in the list, perform the following:
- See if the file has a time stamp in one of the minutes 00, 04, 08, 12 .. 56; if not, skip to 2.a.2.
- Make sure that no file with the same minute value in the timestamp as this file has already been uploaded; if one has, skip to 2.a.2.
- FTP this file to Weather Underground:
- If the file is over 80K, perform the following steps to reduce its size using the Perl Imager package, otherwise skip to 2.a.1.c.5.
- Re-sample the file to JPEG quality 100; sometimes this will reduce the file size enough by itself, since the Perl package tends to compress a bit better than the internal algorithm in the camera. If it does, skip to 2.a.1.c.5.
- Reduce the JPEG quality by 1 and re-sample; each re-sample uses the same original and creates a new, resized file of the specified quality.
- Repeat the previous step until the file meets the size requirement. Generally the JPEG quality setting doesn't go lower than 95, but occasionally it dips to 92 or 91
- FTP the file that meets the size requirement to Weather Underground.
- Create GIF files:
- Create a resized copy of the file as a 320x240 JPEG
- Add this image to the end of the "CurrentDay.gif" animation linked above
- If the file has "00" for the minute field of the timestamp, also add it to the end of the "CurrentDayHourly.gif" file that is shown above(clicking that file loads the more detailed GIF mentioned in step 2.a.1.d.2.)
- Copy this file to Latest.jpg which is displayed above.
- Finally, move this file from the staging directory to a directory for processed files.
- For each file in the list, perform the following:
- Get a list of the files in the staging directory.
- Every day, just after midnight, an archiver Perl script is launched by a cron job on the server. This script performs the following actions:
- Archive all of the previous day's files, using datestamps in the filenames:
- All full-resolution original captures are archived in a tarfile.
- All resized files comprising GIF frames are archived in a tarfile.
- Delete all files that were archived in previous two steps
- Copy CurrentDay and CurrentDayHourly GIF files to archive directory, renaming with datestamps in the names.
- Call a Perl script which generates the MPEG files:
- Extract full-resolution captures from archived tarfile into scratch directory
- Determine sunrise/sunset times using Perl package Astro::Sunrise, using Webcam GPS coordinates and calculate the time at which the sun is 13° below the horizon. Nautical Twilight is generally defined as the point where the geometric center of the sun is 12° below the horizon.
- Get a list of the files in the scratch directory.
- Check the size of each file; occasionally corrupt files are found, typically zero-length or well under 10K in size.
- Delete any file that meets any one of the following criteria:
- Image was captured before sunrise or after sunset as calculated above
- File is smaller than 10K
- Call a shell script which renames all remaining files with names from 00001.jpg to a number as large as necessary, usually something like 03500.jpg. This is a requirement for the next step.
- Encode the JPEG files as a 30FPS MP4 using the open source ffmpeg. This generally creates a 60-80MB video file.
- Copy this MP4 to a public directory using a constant filename so I can link to it, link above.
- Encode the JPEG files as a 30FPS MP4 in the same way, this time using a very low bitrate of 1MB to create a more bandwidth-friendly file(also linked above). This generally creates a 11-13MB video file.
- Remove the JPEG files from the scratch directory
- Generate a link to Weather Underground weather data graph page for the day upon which the video was recorded.
- Call a python script which uploads the video to YouTube as a private video, with the Year and Season keywords already provided along with the weather data link in the description.
- Archive all of the previous day's files, using datestamps in the filenames: